Showing posts with label papercraft.. Show all posts

Thursday, January 8, 2015

Used Christmas cards. 2015

Hi everyone, looking at all my Christmas card after taking them down and it seemed just a shame to throw them away so I decided to use some of them in a different way.
So save all your cards, well at least some of them and I will post another blog to show you what I did with them.
 
 
Choose one of the larger cards, then make sure that the other cards are smaller, it does not matter if they are really small or just smaller. we will use most of them.


I chose not to use these cards as they are covered in glitter or embossed. If the card is embossed you may be able to use it, but no glitter.
 
 
Some of the cards I chose to use, note the one with the corner cut, this is okay and will add interest.
I chose about 6 cards and also my larger card, now all I have to do before the next blog is to paint each side of the card with white Gesso, I use Jo-Sonja, but most makes will do.
 
I have not tried the Mont Mart Gesso, but if you have it try it on one card and see how you go, let me know if you try this please.
 
I just wanted to share this with you so you would not throw your cards away. I will be back soon to show you what I did with them.

Tuesday, October 22, 2013

Smash Art Book

As promised I am now showing some of my pages from my Smash Art book. I have been working in this book in between my Folk art Painting. I find it more creative as I paint what I feel, and it also gives me samples and ideas to look back on. Sometime a simple idea can lead to a folk art design.

Smash books are a way for everyone, even if you have no experience in this type of craft or art, you can still use it to express how you are feeling at the time, it does not have to be painted, craft items are often included into smash books. Some books or pages can be very personal to the person creating them and may never be shown, a form of therapy, If you use acid free products you could also use it as a photo album or journal,  there are plenty of other examples of how to video's on the internet to help you get started.


I started with a basic art book from the local VH dollar shop, cost was $5.50. Taking a piece of watercolour paper (140g) slightly smaller than the front cover, (which is plastic by the way). I taped down the paper to a board while I worked on the pattern. Using a permanent black texture pen (also from the dollar shop) I drew in the horizontal wavy  lines and did a bit of doodling between them, the bottom half I used a stencil and drew through the holes in the stencil, moving it around as I worked. Then I coloured it with water colours, let it dry and glued it to the plastic cover with PVA glue. Make sure that the edges are stuck down.

These two postcards are from a lady  I bought a purse from on Etsy, Bo, sent me these as a little surprise in my parcel. I was not sure what to do with them, as I really liked them I decided to add them to my smash book, with a bit of watercolour, doodling and some writing, it did not need anything else. This is where it can start to get personal and I like the way it is proceeding, either arty or as a visual diary. Smash books are about layering, but I like things more simple, cleaner looking, I enjoy that. How you journal is up to you!

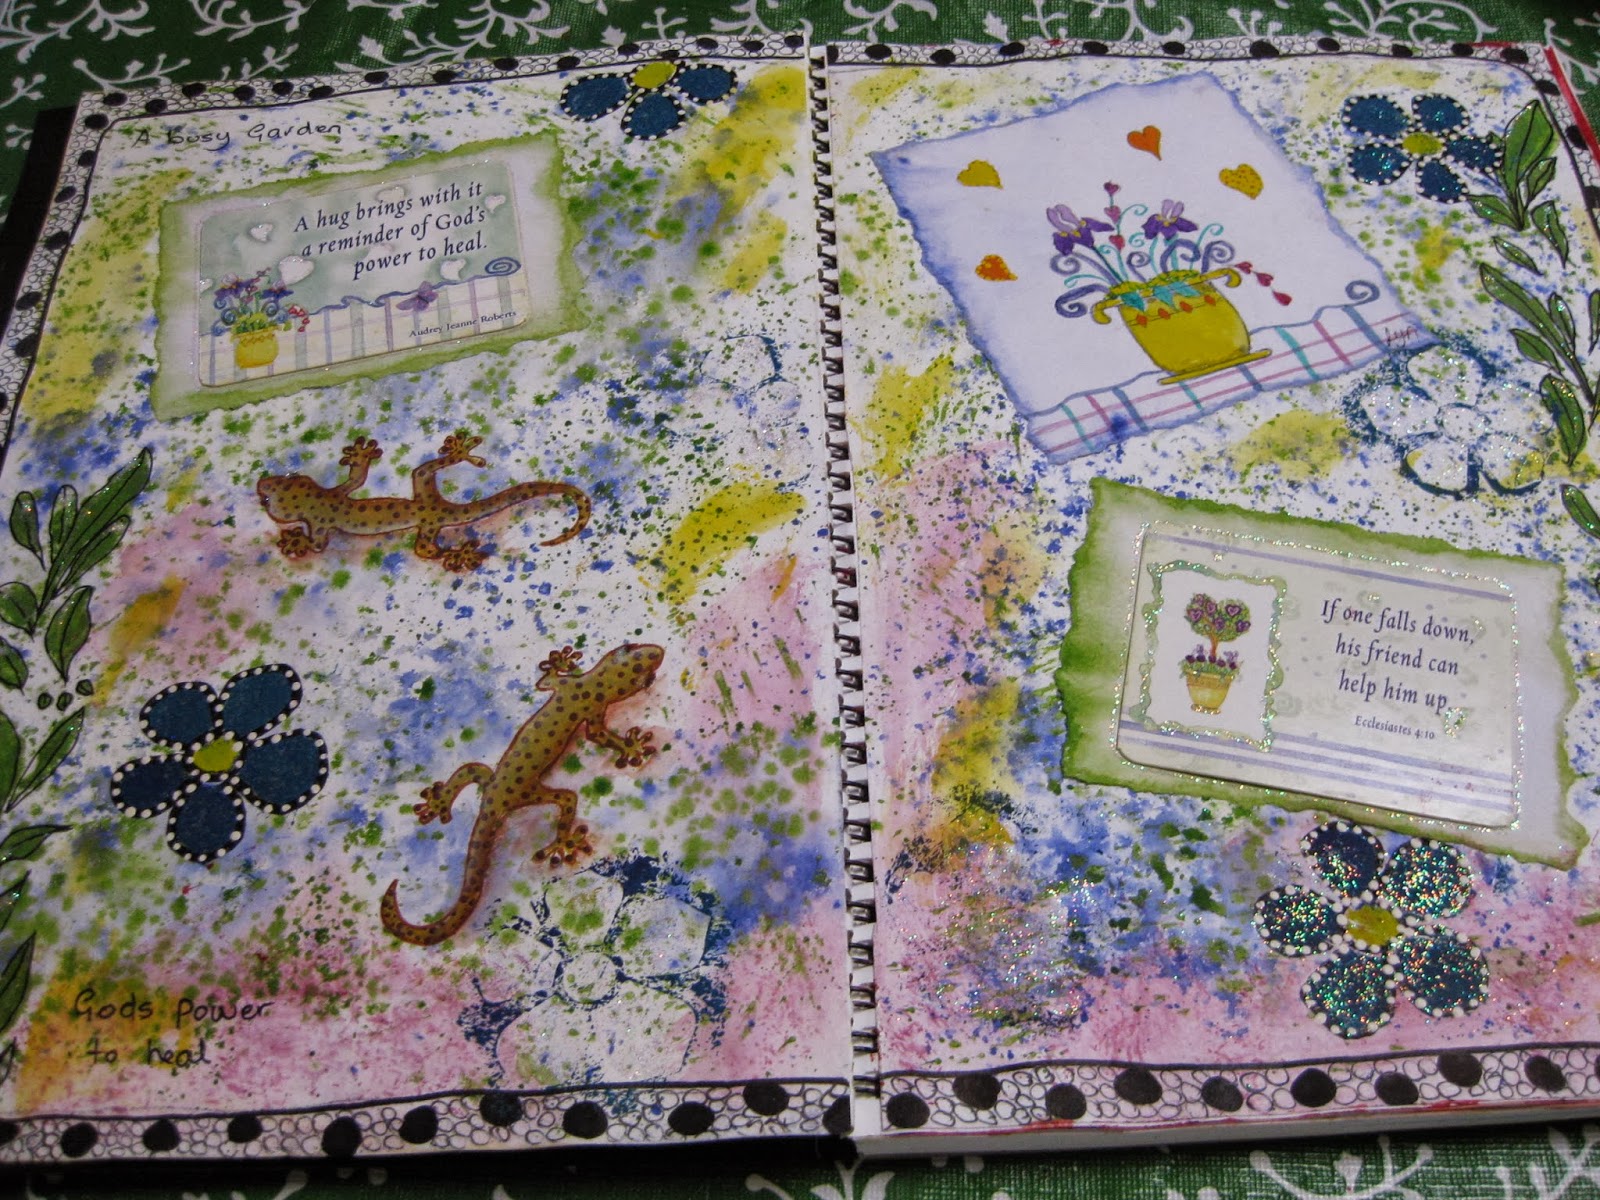
This one is more about layering, as full as a garden can get, it was inspired by the two spiritual cards, I had for ages, with a little bit of layering using stamps, splattering, stenciling and some painting this page emerged. 


Work is ongoing and I intend to keep going with this type of work as well as with Folk Art.
Next Sunday I am attending a workshop with the Mountains and Rivers, looking forward to that and I have a teacher that I have not worked with before so it should be fun! Photo's later. Enjoy!


Tuesday, October 30, 2012

Count down to Christmas

After hording this Advent Calender kit for over a year (bought at Spotlight in a sale after two Christmas's ago), I decided to decorate it for my two youngest grandchildren, now aged  3 years, and 17 months. Each drawers is big enough to hold two chocolates.


The whole box comes as a flat pack, trouble? set with papers and glue I started to make up the boxes, 24 in all. I made a template out of the flat box, cut out 24 lining papers, scored and glued the lining onto each inside of the boxes. Good so far!

I then made a smaller template for the bottom of each box, cut out the 24 bottoms with enough paper on each side to go partly up the box. I then glued the boxes together, first problem as the boxes were made of cardboard the first layer of cardboard kept coming away as I glued the box together, so glad I decided to cover all the box as it has made them stronger.
When these were dry (and make sure that they are square otherwise they will not fit the holes) I glued the bottom papers onto each base. placed glue on each of the 4 (shorter) sides and glued them down.

Next I measured around one box and the depth plus a little for the overlap and cut out 24 strips of patterned paper, glued each strip to the outside of each box overlapping slightly at the back.
When they were dry I used a sharp craft knife to cut around each finger hole. a lot of work but now they are stronger and not falling apart.

Now the box, the flat pack needs cutting apart as the walls are joined together, you also need to trim the nodules so they fit flush with the back when glued in place. I tried a craft knife, but nearly broke the blade, so arm yourself with a Stanley knife, but please be carefull! Once apart you can sand them, but being MDF it is not good to sand before painting.
The back and outer walls I painted with Jo Sonja-Poppy. I then covered all the inside walls of the box, and all the little dividers  with papers, using a craft knife to trim any areas that needed a trim when the paper was dry. Any areas that were to be glued together I did not cover with paper.

Gluing the box together with PVA wood glue for strength. Please take great care that all the walls are square, and the dividers have enough even space between them to hold a box.  I had to use 3 hand  vices to help do this job, and I used spare paper to put under the vices so that it would not tear the paper. Also the paper on the walls has to be dry.
The papers I bought from Spotlight, a set of matching 12 x 12 papers in a pad for $10 (VIP price) including the  paper I used in the middle. Spotlight was the only store with Christmas paper, and choice was limited.

I have left the center with nothing in it as my Daughter can add her own ornament's as she wishes. The numbers I looked all over for, Spotlight, Lincraft, two dollar shops and they had nothing like I wanted, I came home, looked through a stash that my Mum had and found just what I needed. I glued a large sequin onto each box and then added the numbers, to finish I added a small puffy glue on, stocking, candy cane or holly. All in all it took me over a week to finish! was it worth it?  
YES for my Grandchildren. Would I do it again? No!